Setup Configuration Management for Drupal 8 or 9 in 30 minutes
Introduction
Configuration management in drupal 8 provides a solution to a common problem when working with a website across multiple environments. Regardless of workflow at some point the configuration needs to move from one place to another, that is from local environment to production environment. When you pushing the development or local to production you need to have some common repository to export or import configuration entities via YAML format.
Below listed are considered configuration:
- Content Types
- Block Types
- Everything under Admin -> Configuration
- Everything under Admin -> Appearance,
- Views
Below listed are considered content and are not touched by this system:
- Nodes
- Custom blocks added on admin/structure/block/block-content
- Users
- Content for other entities
Lets setup drupal 8 for configuration
Navigate to the project root
Create new config and sync directories in the project root
mkdir config
cd config && mkdir sync
Update settings.php
Go to default directory
cd docroot/sites/default
sudo nano settings.php
Add the following line in the settings.php
$config_directories['config_sync_directory'] = '../config/sync';
Export Your Active Configuration
After working in development site now it’s time to move the configuration to the production
Step 1 :- From your development site, go to Configuration page and then open Configuration synchronization tab. This section allows you to import and export configuration.
Step 2 :- Click on Export tab and then click export to export full site configuration you can export single item also as per your requirement.
Step 3 :- Export and download the full configuration of the site as a tar file
Single export ( only works with drupal admin ui)
Step 1 :- Go to Configuration page and click on tab single item
Step 2 :- Copy the respective configuration and create a .yml with below mentioned filename (In our case contact.form.personal.yml) and put the into sync folder which is mention in settings.php
Using Drush (Recommended)
Step 1:- go to terminal
Step 2:- go to project directory docroot
drush cex
Importing configuration
Step 1 :- From your another site go to Configuration page and then open Configuration synchronization tab.
Step 2:- Upload a full site configuration archive to the mention directory in settings.php. Then it can be compared and imported on the Synchronize page.
Step 3 :- Finally click import all to import all the configuration from the Folder and then clear the caches and your work is done!!!
Using Drush (Recommended)
Step 1:- go to terminal
Step 2:- go to project directory docroot
Step 3:- Pull the code from github
drush cim -y
Configuration Ignore
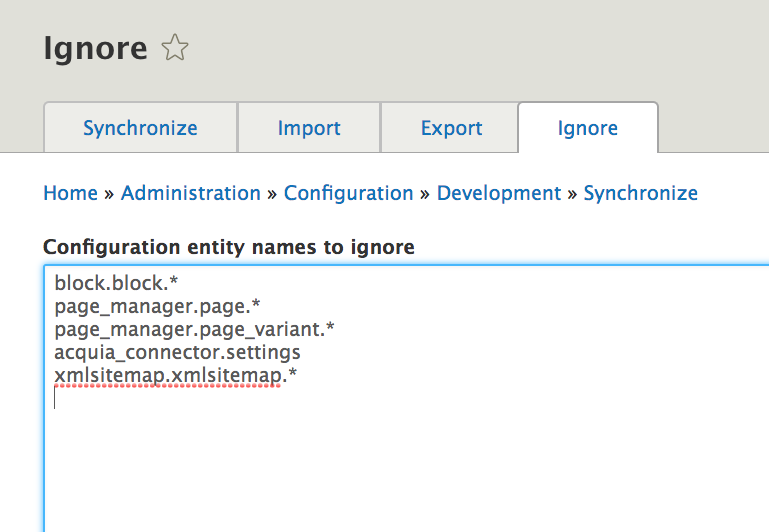
Configuration Ignore is a straightforward contributed module that does what its name suggests - it ignores configuration on import. You can look at the project page at https://www.drupal.org/project/config_ignore. The key to leveraging the power of this module using the correct configuration entities to ignore. The module adds a form at /admin/config/development/configuration/ignore where you input a list of configuration names to ignore. It supports patterns, so you can exclude large chunks of configuration easily. We need to not overwrite/delete configuration which represents content components on the site. Most of these components are blocks, so I’m looking to exclude the blocks built as content, but not the structure (fields, display settings, etc.) of the blocks themselves. The entries you put in this form follow the file names of yml files in your site’s config export directory. Looking at the config directory for the site, I can see that these content blocks are in files which start with ‘block.block’. Also, as new landing pages are created using the Page Manager, we want to make sure that these aren’t touched on configuration import. These start with “page_manager.page” and “page_manager.page_variant.”
